Ballet Basics: Common Errors In the Feet

halfway
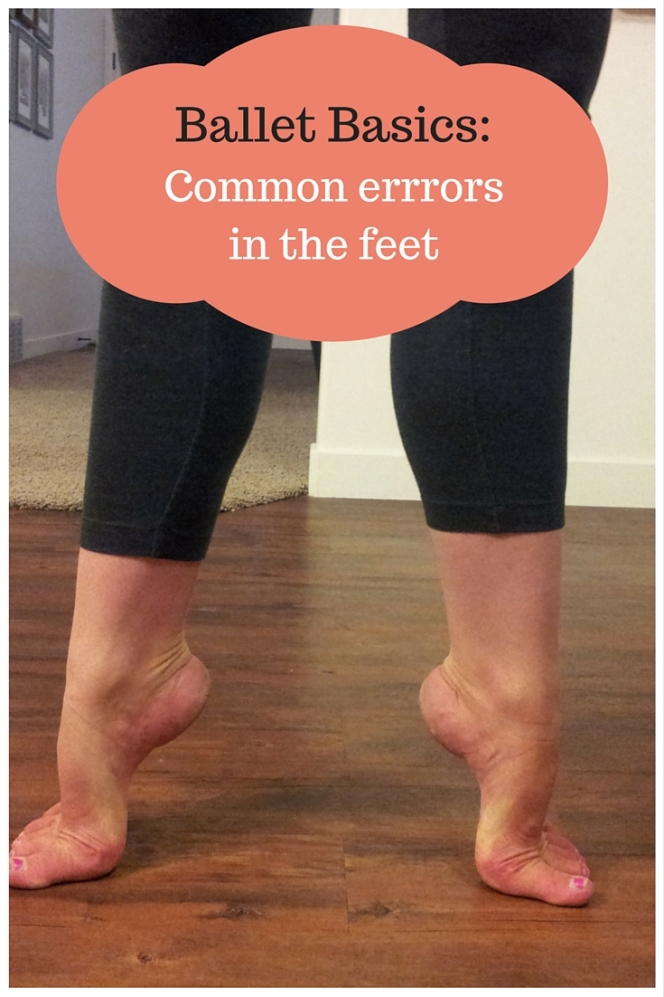
Welcome to ballet and the obsession with feet! Here are some of the most common errors I see with ballet students and their feet.

First I have to start off by introducing the concept of sickling.  It is a funny word and I have no idea where the term comes from, but it is well known in the world of ballet and is the most common error of the feet.  One of the biggest places I see this is in students who are beginning pointe work.

So, what is a sickle and why is it bad?

Sickling is in the most basic form, when your heel drops behind your leg.  This is undesirable, because it breaks the line of the leg in which we very much want in ballet.   It can also be unsafe if you are en pointe or in releve because it is very unstable and will likely roll and injure your ankle.  Let’s take a look at some sickled feet.
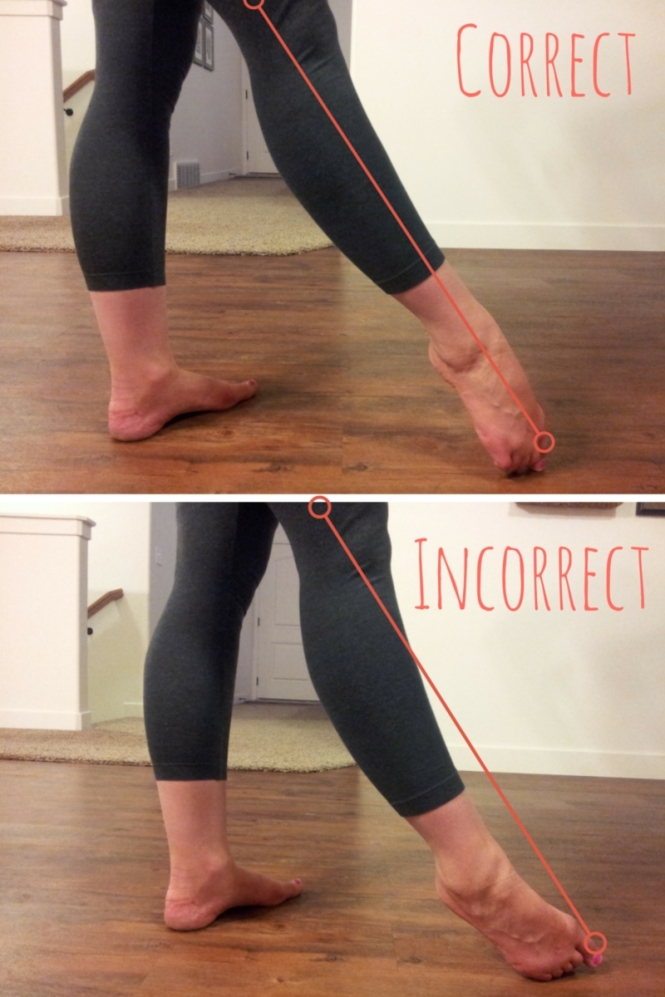
Correct(4)Notice how the line of the leg is broken with the sickled foot.  Also, notice how the heel is low.  A visual that is always important in ballet is keeping your heels forward.  You will probably hear this a lot, and it is referring to this (not sickling), as well as holding your turnout.

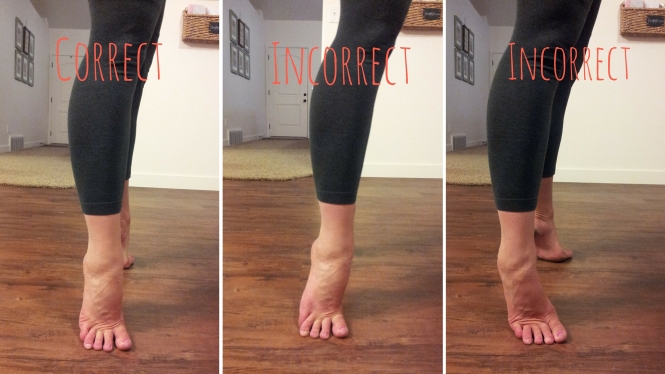
Now let’s look at a sickled foot while up on releve.  CorrectThe far right photo is the sickled foot. Again, notice how there is not a continuous line following through to the toes.  The middle picture is also wrong because all of the weight is pressed forward into the big toe.  This most often occurs when you are trying to increase your bevel (I will talk about bevel/winged foot in a minute) but it is also a potentially unsafe position, especially when dancing en pointe.  You ideally want all of your weight to be aligned right over your second toe, like in the first picture.  This creates the purest line and is the most stable.
Now, another strange term that we commonly use is the bevel or winged foot.  Again, I have no idea where the terms come from, but it is an aesthetic in ballet that you can most often see in the arabesque position.  It is created by lifting the toes upward or in the opposite direction of a sickle.  It is pretty in arabesque, but when you look at it from this angle, it is not so pretty. 😦 Winged footA winged foot, will usually break the line of the leg when looked at from the front.  Notice above, how the ankle is not fully stretched.
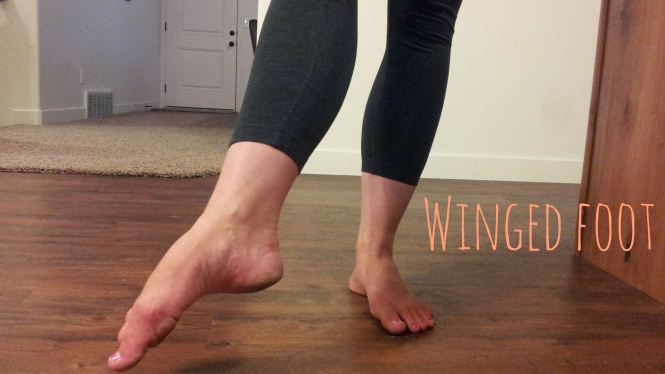
To achieve your best pointed foot in ballet, you need to make sure that the ankle is stretched all the way.  Often times Students will stretch and point their toes, but then the ankle is flexed and breaks the line.  When students try to get their feet to bevel, it can sometimes cause the ankle to slightly flex, which you do not want!  Therefore, unless you have amazingly awesome feet and can achieve a beveled foot while still maintaining a fully stretched and pointed ankle, I would recommend just focusing on creating your best possible line and point.

There are fortunately, exercises that you can do to help increase your beveling ability.  If you are trying to work on this, a theraband may become your best friend.  Most of these exercises will work and strengthen the outer side muscles on your calf.  Here is a simple exercise you can do to get started:

  1. Sit on floor with legs in a parallel (knees facing ceiling) extended position.
  2. Point your toes down to the floor, making sure to fully point the ankles.
  3. Slightly pulse the toes out towards the sides of your body, without releasing your ankles.
  4. Keep repeating until your muscles cramp up 🙂
  5. If you place your hands on the outer side of your calves while doing this you should be able to feel the muscles working.

This is a great exercise because it is very simple and easy to do while you are doing homework, or watching TV.  This exercise can get you started on strengthening your feet until I post some more in depth conditioning exercises.  Make sure to check back in!

Nutrition For Dancers

I thought it would be good to talk today about nutritional choices for dancers. Eating a healthy diet very much ties into our dancing abilities, so let’s talk about how and what we should eat to produce a happy dancing body.

It is important that we give our bodies the right amount of fuel (food) to give us energy and strength to dance. This means that we need to be careful to neither under eat nor over eat. If we do not eat enough we will not have enough strength, and if we eat too much, we will feel sluggish and weighed down. I would really like to get into this more, but it will just make this post incredibly long, so I’ll save it for another day. Basically though, if you are dancing a lot every day, you are going to need to eat more than the average person. I am going to talk about the 5 food groups below and their recommend daily servings (from the USDA). These serving sizes are for the average person, so depending on how often you dance you may need to eat more than the recommended amount to fulfill your energy needs.

The 5 food groups that we should eat from daily are vegetables, fruit, grains, protein, and dairy.  You should never cut any one of these food groups out of your diet unless you have talked about it with a dietitian or health professional.


Fruits and Vegetables

It is recommended to eat around 2-3 servings of fruit, and 3-4 servings of veggies everyday.  A serving is 1 cup of fruit/veggie.  A good way to make a guess about serving size is by measuring with the size of your fist.  These can be eaten fresh, pureed, frozen, canned, or dried (for dried fruit serving is 1/2 cup).

veggies

Photo credit: muammerokumus / Foter / CC BY-SA


Grains

The recommended daily amount of grains is 3-6 servings. This group includes breads, tortillas, oatmeal, rice, cereal, pasta etc. Examples of serving sizes are 1 slice bread, 1/2 C rice/pasta/oatmeal, or 1 C cereal. I very highly recommend that you make your serving choices all whole grains. Eating whole grains is important for dancers because they will give you the energy necessary to get through your classes. Some whole grain choices include brown rice, barley, oatmeal, and whole wheat pastas/breads. Be careful when picking out wheat breads because some products only have a trace amount of actual wheat. An easy way to know if a product is whole grain is to look on the packaging for the 100% whole grain stamp (google whole grain stamp to see what it looks like).

bread

Photo credit: Veganbaking.net / Foter / CC BY-SA


Protein

To get the recommended amount of protein you should eat 2-3 servings or 5-6 oz each day. For dancers it its good to eat lean sources of protein such as fish, beans, nuts or chicken breast. If you eat non-animal sources of protein you need to make sure you are also eating whole grains to make it a complete protein. A really great source of protein for dancers is lentils.  It is not a terribly popular or well known food, but I am a fan of them and here’s why:

  • It is high in protein
  • Minimal amount of fat
  • High in Iron
  • It takes flavors and spices really well and you can use it as a substitute for ground beef in virtually any recipe – tacos, sloppy joes, hamburgers, meatloaf etc. I love them because I can fulfill my cravings for a lot of junk foods without a lot of the “junk”.
  • They are inexpensive!
    Pretty much you should eat a lot of lentils is all I’m sayin. 🙂
beans

Photo credit: cookbookman17 / Foter / CC BY


Dairy

The recommended amount of dairy each day is 3 servings. This can be 1 cup of milk, soymilk, or yogurt, and 2 oz cheese.

milk

Photo credit: striatic / Foter / CC BY


Now, let’s face it, dancers are busy and sometimes the only time to eat is in between classes. Here are some easy, healthy snack ideas, for those small in between moments.

  • Nuts – cashews, walnuts, almonds
  • Cut up fruits and veggies
  • Raisins or other dried fruit
  • Granola bars – look for ones that don’t have a lot of sugar
  • Whole grain crackers

What else would you put on this list?  What is your favorite healthy dance class snack?

Photo credit: theilr / Foter / CC BY-SA

Photo credit: theilr / Foter / CC BY-SA

Ballet Basics: Posture and Alignment

Hello again! Today I am going to talk about the proper posture and alignment you need to have during ballet class.  There is so much to talk about regarding this concept, so I hope that I will cover enough information to at least get you going.
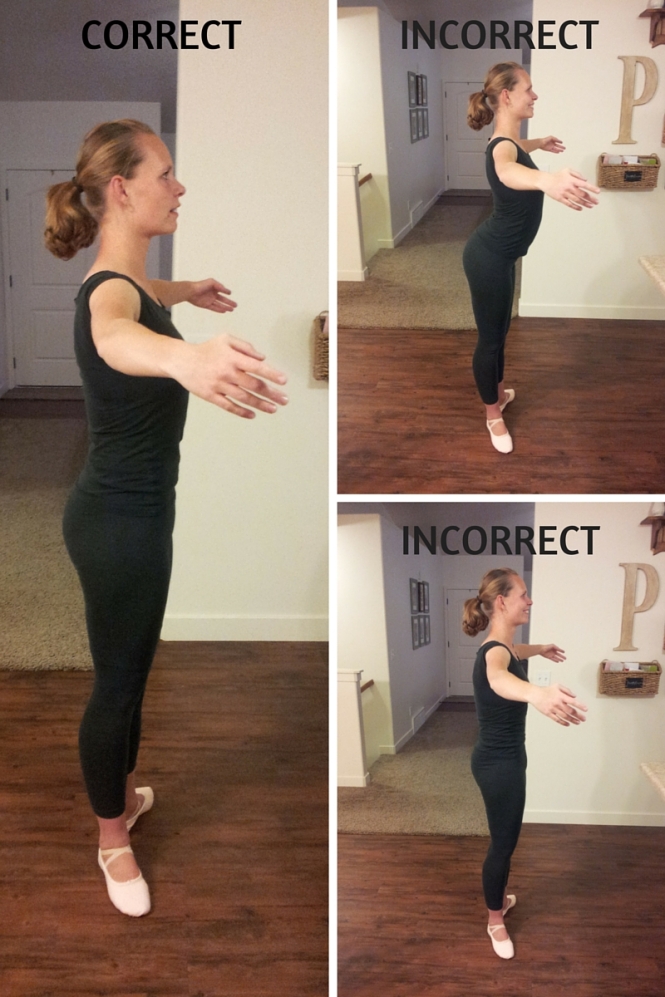
To start off, let’s take a look at how you want to be standing alongside with some of the most common mistakes seen in ballet class.

GOOD

Now let’s break these down and see why the one on the left it good, and the two on the right are bad.

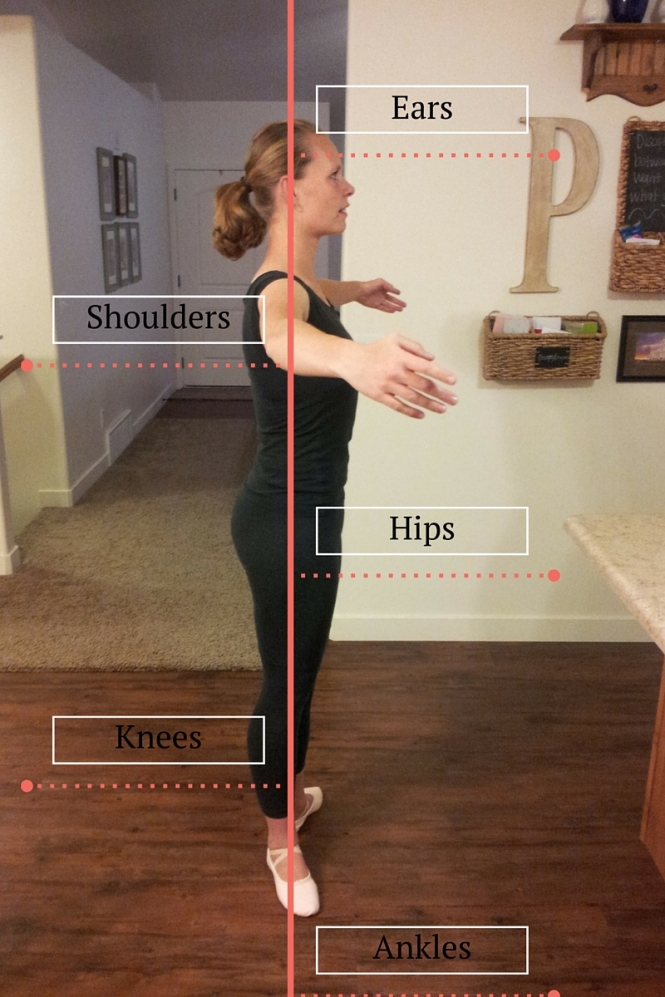
An easy way to determine if your body is aligned correctly is by following what is described as plumb line posture.  Basically, If you were to hang a string from the ceiling, certain parts of your body would need to be aligned with the string.  Here is a visual of the correct alignment.

Wake up

Notice how all listed body parts are aligned with the “plumb line”.   Everything is correctly stacked on top of each other so that no areas of the body are gripped or put under stress.  This is ideal because we do not want to have muscles working hard when they don’t need to be!  We want to save all our strength for the beautiful dancing. 🙂

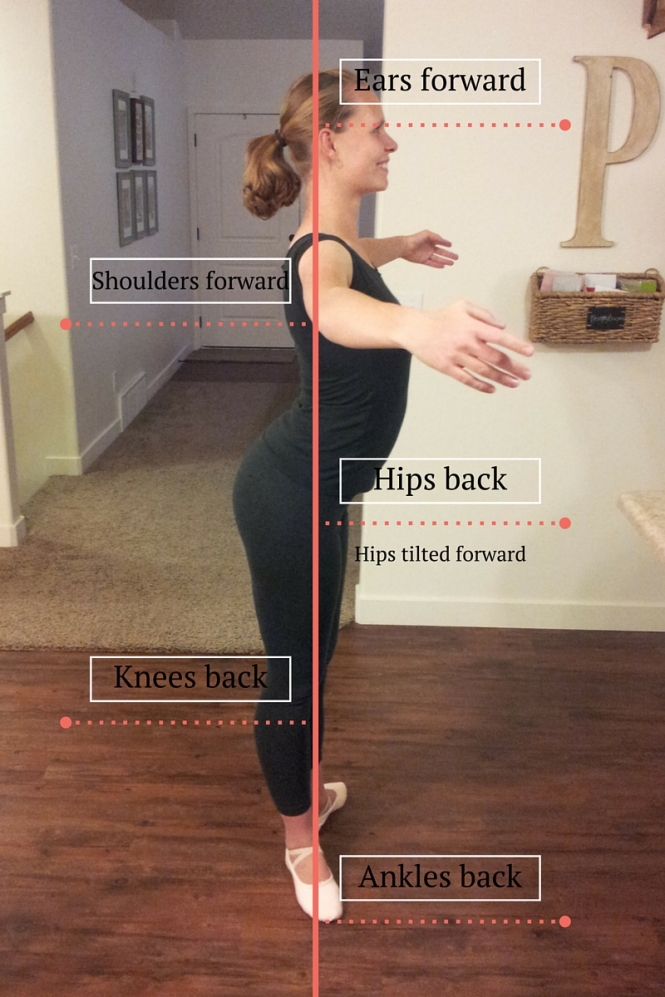
Now let’s take a closer look at the common incorrect postures.  These are most often refered to as sway-back and tucked.

Sway-backWake up(1)

I don’t think any one really stands with this much sway in their back…but it gets the point across.  This is a bad way to stand in ballet class, but also just everyday standing in general.  It puts a lot of pressure and stress on the lower back.  So how do we fix it???

Wake up(2)

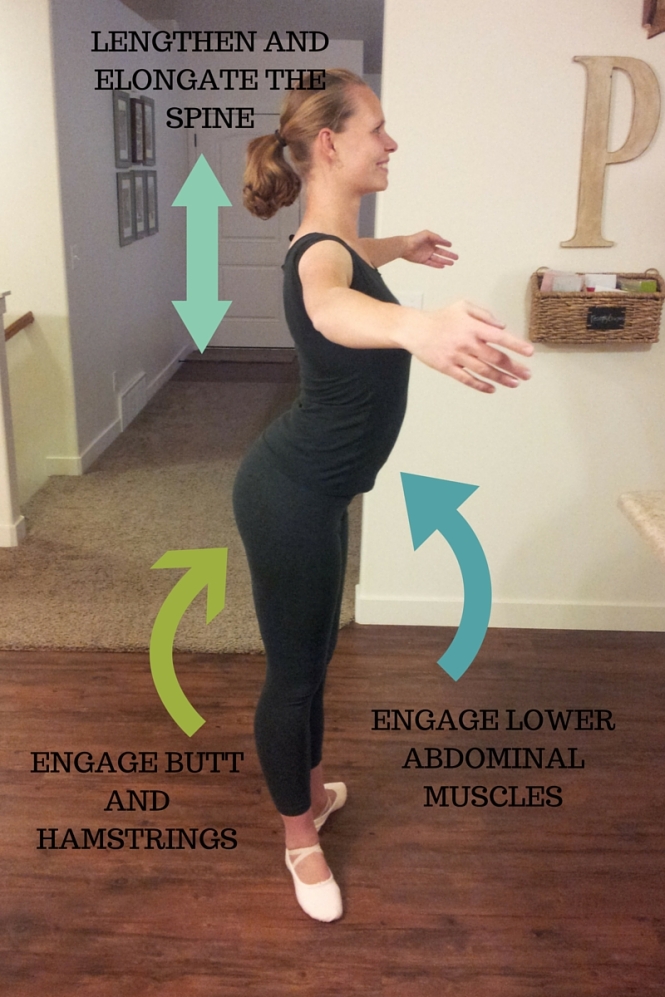
Lengthen your spine, and engage the butt/hamstring and abdominal muscles.  The biggest one here is the abdominals.  They should always be engaged in ballet class.  The abdominal muscles will help to take some of the pressure off of the lower back.  Another important thing about sway-back is that it is often a result of tight hip flexors (muscle at the front of the hip).  So if you struggle with sway-back I would recommend stretching your hip flexors every day.  One easy way to do this is by kneeling on the floor with one leg in front of you (as if you are proposing to someone) and then press forward into the hip of the back leg.  I also know of an awesome stretch that is similar to this, but is a much deeper and better stretch for those of you who struggle with tight hip flexors.  Check back in for my next post so you don’t miss out!  Tight hip flexors are very common in ballet dancers because we are always lifting our legs up in the air.  We need to make sure that we take the time to stretch those babies out!

Now, moving on to the next incorrect posture.

TuckedWake up(3)

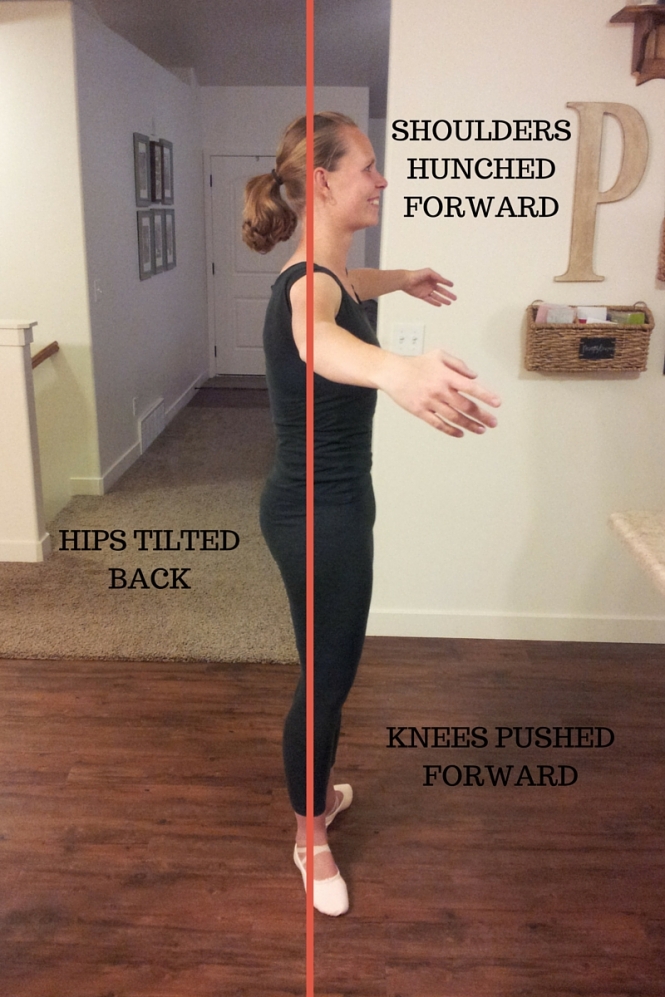
I see this error most often when students are standing in 5th position and forcing their turnout.  I also see it as a form of overcompensation.  I am going to be honest with you here.  I have a larger backside than most ballerinas, so teachers would often correct me thinking that I had a sway-back, when in reality it just looked that way from having a slightly bigger bum (don’t worry, I love my bum!). As a result I ended up overcompensating and standing in a tucked position.  The real goal here is to have a neutral pelvis (I will talk more about this later) not overcompensation.

This position is bad because it pushes the knees forward into an unsafe position.  It means the knees are not fully stretched which is not only unsafe but disrupts the line of the leg which is so important in ballet.  Another issue here is in the shoulders and chest.  It pushes the shoulders forward and encloses the chest area.  In ballet, it is desirable to have a presentable upper body which is achieved by an open neck/chest and the shoulders down and back.  So you can see how this would create an undesirable look.   Now, how do we fix it???

Wake up(4)

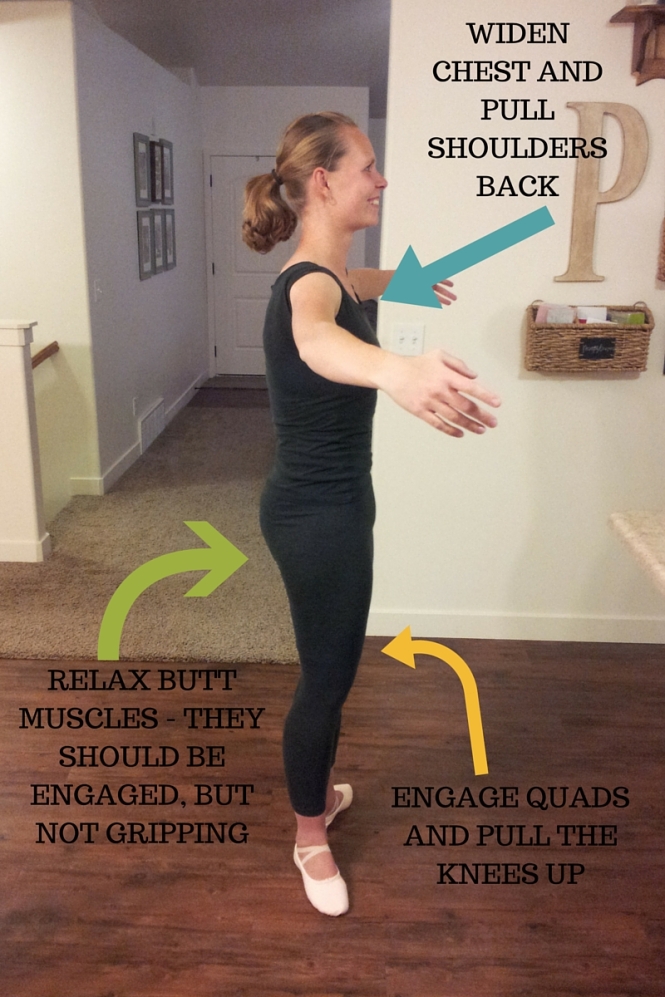
Do not squeeze your butt! Pull up through the quadriceps, and widen the chest by pulling the shoulders back.  The biggest thing here, is that you need to find your neutral pelvis.

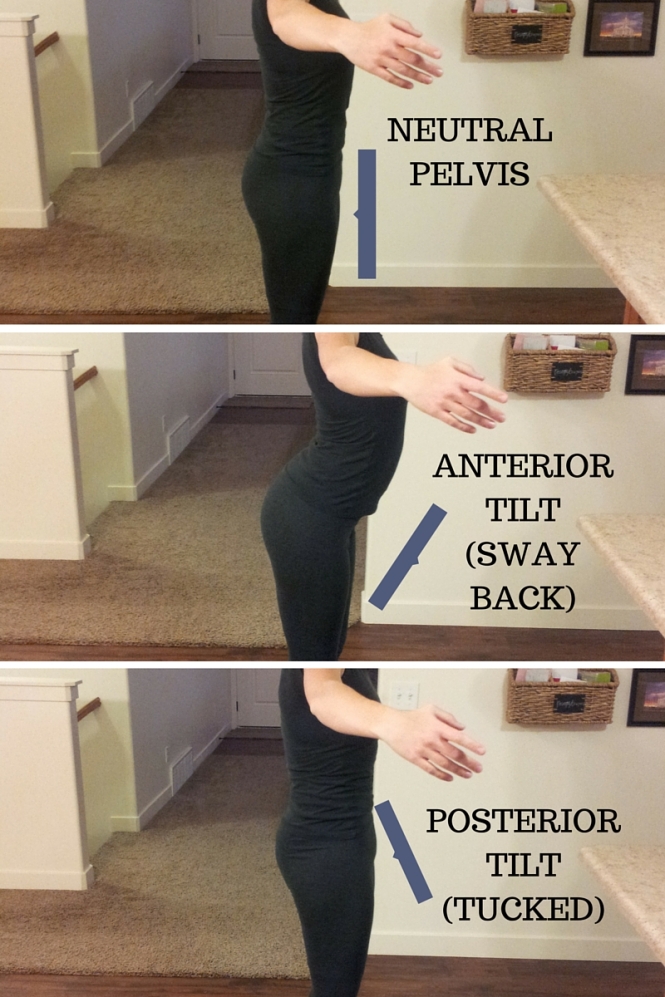
I know this is getting long, but hang with me just for this last bit of important information.  Finding your neutral pelvis is an essential part for having proper alignment.  To do this, take a look at your hips facing side to the mirror.  Put one hand on the top of your hip bone (a.k.a. anterior superior iliac spine) and the other on your pubic bone (a.k.a. pubic symphysis).  If there were to be an imaginary line drawn between your hands it should create a perpendicular line to the floor.  Neutral pelvis

If you see a tilt in either direction you can adjust it accordingly.  This is important to do, because every body is different and you have to find what your own personal goal is.  That way if you are blessed with more backside like me you can find exactly where your pelvis needs to be without overcompensating.  🙂

As you can see, there are a lot of things to think about!  I am only scratching the surface here, but hopefully this will get you started.  If you found this information helpful, be sure to share it with your friends!

Romantic Ballet

In my last history post, how ballet began, I addressed how ballet started out to be very different from what we see today.  Ending in the late 18th century, we now move on to the 19th century, where Romantic Ballet was formed.

In previous centuries, the dancers were mainly male.  Even if a story had a female character it was danced by a male dressed as a woman.  In the romantic period of ballet, we see a huge shift in the female role.  Everything became very feminine and females were now the dominant gender.  We start to see the tutu and dancing on the toes.  There was a strong desire for dancers to create an illusion of effortlessness and weightlessness.  These are all things that we know ballet as today and are finally starting to see some similarities.

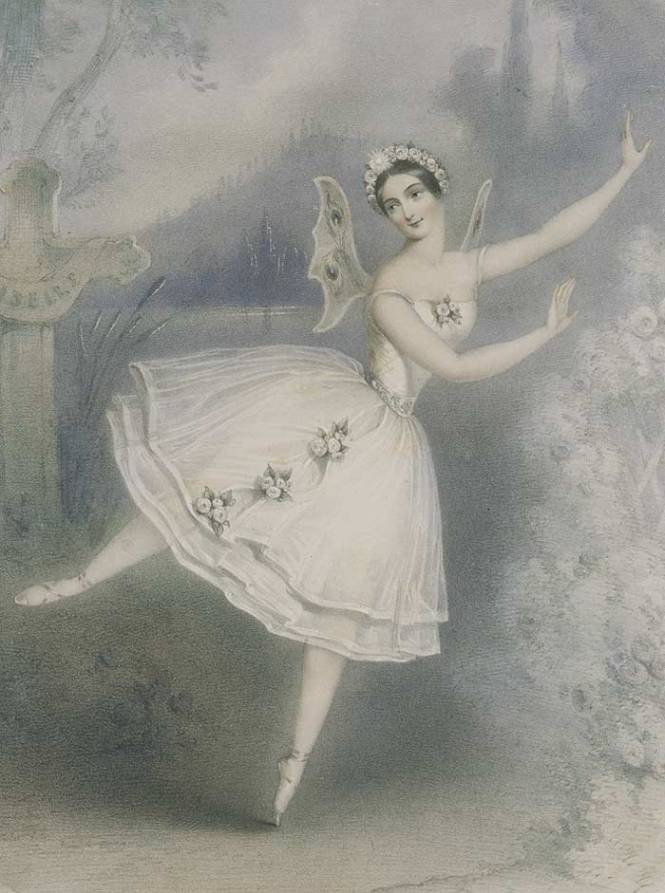
I have to say that romantic ballets are my favorite!  Many of the stories behind the ballets of this period were dramatic love stories and often involved ethereal creatures like fairies, nymphs, spirits, and demons. One of the ballets that is still performed on a regular basis by ballet companies today is the ballet Giselle.  It was danced by one of the great ballerinas of the time period, Carlotta Grisi.  I will talk more about Giselle in a later post, but some other ballets to note from the romantic period were La Sylphide, Grand Pas de Quatre, and La Esmeralda.

Giselle_-Carlotta_Grisi_-1841_-2

Carlotta Grisi in Giselle

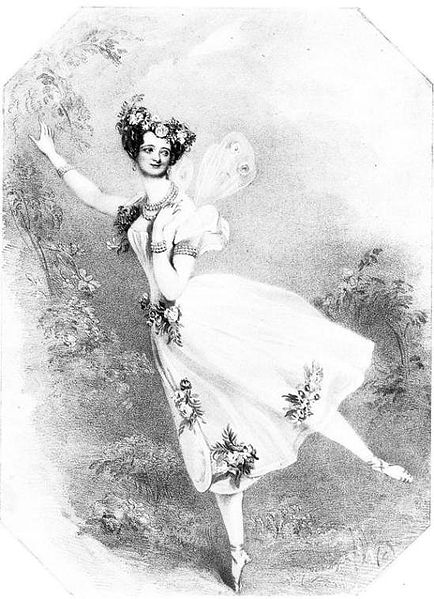
In the performance of the ballet La Sylphide, the dancer Marie Taglioni was the first to dance on the tips of her toes.  Taglioni did this with the strength of her own feet and without what we know as pointe shoes.  The pointe shoe was not developed until later in the 19th century.  We also see in this ballet the romantic tutu which is a long layered tulle skirt that reaches to the mid-calf.

marietaglioni

Marie Taglioni in La Sylphide

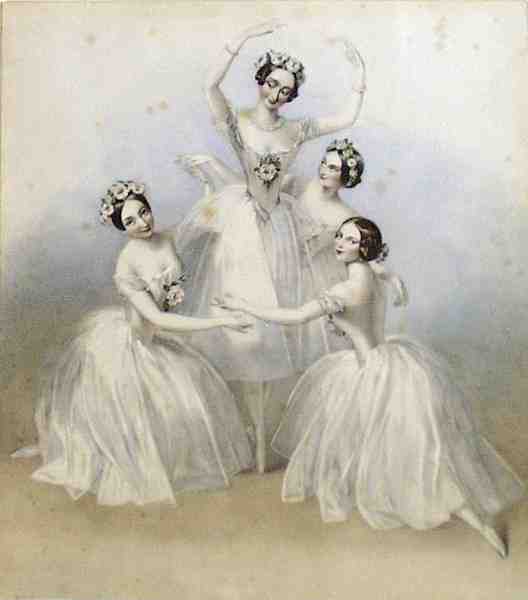
A notable choreographer of the time, Jules Perrot, developed the use of ballet as a separation from acting.  In other words, he created the first plot-less dances with no story to act out.  The dancers were dancing merely for the sake of dancing.  The ballet that we first saw this in was in the Grand Pas de Quatre, or dance of four.  This ballet included four of the greatest ballerinas of the time including both Taglioni and Grisi.

Pas_de_quatre1845

Grand Pas de Quatre

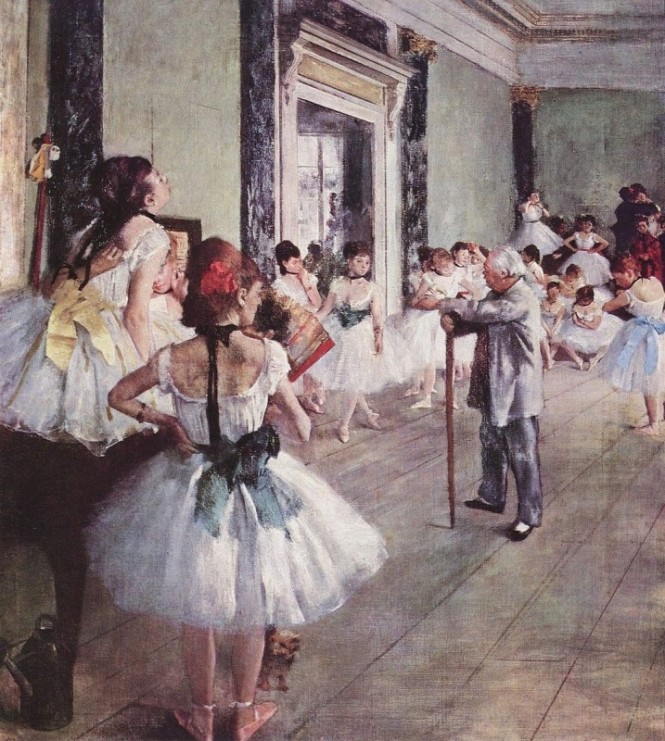
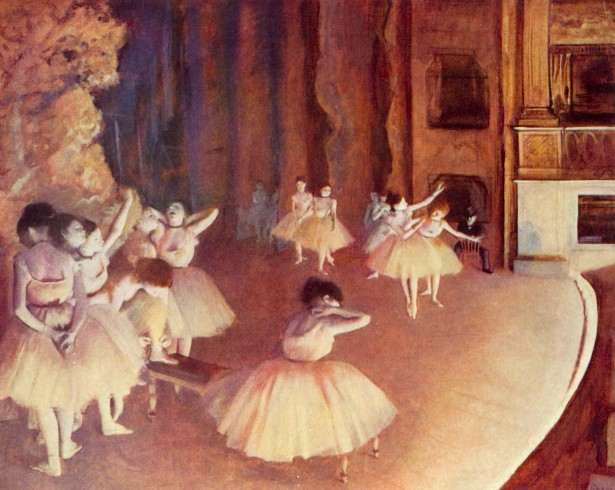
It is also important for me to mention here that August Bournonville was a dancer and choreographer of this time.  If you recall from my post about different ballet techniques, Bournonville was mentioned as another technique to learn.  It is not used much at all today, but it is from the style of this particular time period.  Another important part of this time period was the paintings of Edgar Degas.  If you have ever seen his beautiful paintings of ballerinas, this is when he created them!

edgardegas1

edgardegas

At the end of the century, ballet was losing its role as a new mainstream art, and was slowly starting to die off.  Stay tuned to learn how ballet made its comeback!  I leave you now with a video of the Grand Pas de Quatre (performed in the 1960s).  Please note how the movement performed is all very light and delicate keeping true to the style of the romantic ballet. 🙂

Source:  Au, Susan, and Susan Au. “Ascent and Descent.” Ballet and Modern Dance. 2nd ed. New York: Thames & Hudson, 2002. 45-59. Print.

Ballet Basics: The 3 Main Teaching Methods

It may seem like all ballet teachers teach from one universal technique, but there are actually a few different styles and ways to train a ballet dancer.  These styles incorporate many similarities, but the main differences are in the arm positions, arabesque positions, and overall general style of movement.  Here I will talk about the 3 main teaching methods that teachers use today.

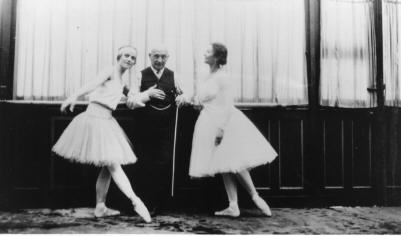
  1. Cecchetti – Otherwise know as the Italian style of ballet.  It was developed by Enrico Cecchetti, and is known for having strong allegro (jumping) qualities.  In the Cecchetti method the arms are very fluid, and there is an emphasis placed on anatomy and the dancer learning how to execute the movements themselves rather than just imitating the teacher.  The Cecchetti method uses specifically planned out lessons and daily exercises.

    enrico6

    Enrico Cecchetti

  2. RAD – The Royal Academy of Dance or English method is a very popular method to teach.  You must be certified to teach this style and the students must pass an examination each level.  The main characteristic of this method is that it is very meticulous and you progress very slowly to make sure everything is executed correctly.
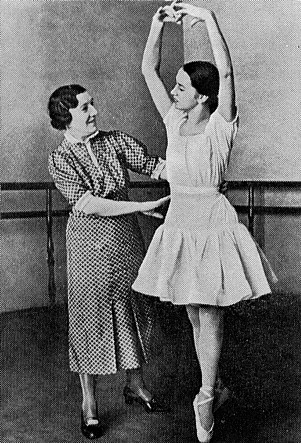
  3. Vaganova – Otherwise known as Russian ballet.  This method was developed by Agrippina Vaganova.  She pulled techniques from both the French and Italian schools and created a mixture of strong jumps and flowing adagios.  Some of the best dancers in history were trained in the Vaganova method including, Anna Pavlova, Natalia Makarova, Rudolf Nureyev, and Mikhail Baryshnikov.  Vaganova classes are usually choreographed by the teacher instead of having a strict syllabus and lesson plan to follow.

    vagan02

    Agrippina Vaganova

These are the main teaching methods, but it is also important to note the Bournonville, and Balanchine methods.

Bournonville is a style taken from August Bournonville and 19th century French ballet. It is not seen much today, but is part of the style of Romantic ballets. It is very soft, and delicate with minimal arm movements.

Balanchine style is from the School of American Ballet, and trains dancers to be able to execute George Balanchine’s choreography, mainly extremely quick movements and precise musicality. Some signatures of the Balanchine style are doing pirouettes from a 4th lunge position, and the way the middle finger is held in the hands.

It is very common these days to have a teacher who teaches in multiple styles and variations It is important to know and become familiar with all the different styles of ballet training so you can adapt and become a more well rounded dancer.

What style does your teacher teach you?  If you don’t know the answer to that question you should ask them!

Source:  Foster, Rory. “Danse De’Ecole.” Ballet Pedagogy: The Art of Teaching. Gainesville: U of Florida, 2010. 6-19. Print.

How Ballet Began

figure95

When ballet first began, it was very different from what we see today.  Ballet was used mainly as a means of political propaganda and was an addition to poetry and opera.  Although it was a far cry from what we now see, it is what gave ballet a signature of grandeur and nobility.

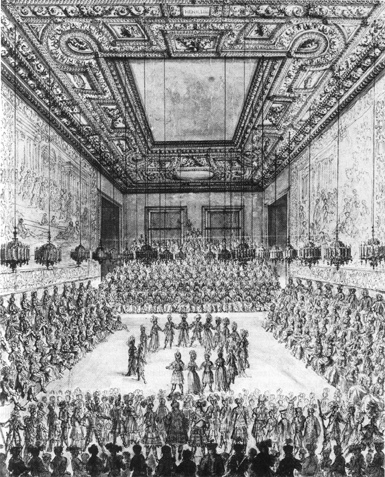
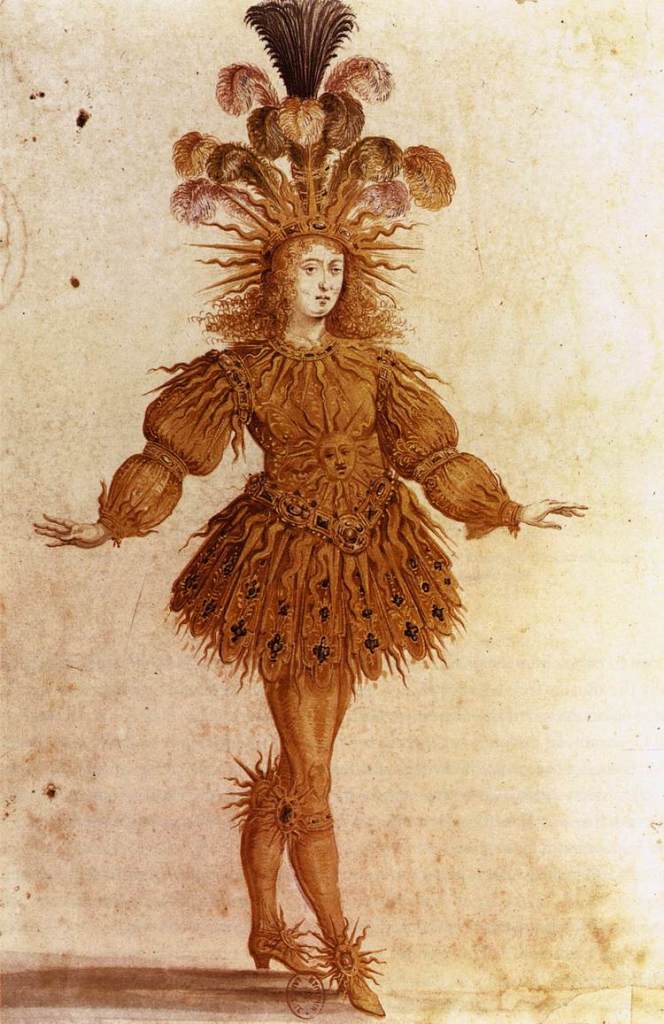
Ballet started in Italy in the 15th Century.  It soon followed as a court dance in France during the 16th century.  The dancers in that time were not skilled professionals, but noblemen that were led by the king and queen.  Instead of performing technical tricks, the focus was more on showing off elaborate clothing and decor.  The dancers did not perform on a stage, instead it was in the French courts, where the audience viewed the dancers from all sides of the room.  This is why it is called court ballet.  The court ballets were most popular during the reign of Louis XIV.  He is known in ballet for his performance as the Sun God, and the strong political influence.

Ballet_de_la_nuit_1653

King Louis XIV as the Sun God

As time passed into the 17th century, ballet was starting to turn into more of a professional skill.  The proscenium stage was created and dancers began to perform technical skills like jumps, and turns.  A man named Pierre Beauchamp began to make notes of the steps and techniques performed and is the person who first created the 5 ballet feet positions that we use today.

Continuing on into the 18th century, ballet was transformed from the court ballets into the ballet d’action.  The dancers started to show emotions and expressions through their movements and their dancing was used to tell a story.  Ballet was no longer used only as an addition to the opera or poetry, but could stand alone in its ability to convey meaning.

At this point, as much as ballet had changed from when it began in the 16th century, it still was pretty far off from what we know as ballet today.  It wasn’t until the 19th century that we start to see a resemblance.  I will talk about that in my next history post, so be sure to follow the blog and check back in so you won’t miss it! Thanks for reading!

Source:  Au, Susan, and Susan Au. Ballet and Modern Dance. 2nd ed. New York: Thames & Hudson, 2002. Print.

Ballet Basics: 5 Common Phrases You May Hear in Ballet Class.

If you are new to ballet classes, there may be some terms or phrases said that you do not fully understand.  Here, I will explain some of the ballet lingo and what a teacher means when they say it.
Phrases You May Hear In Ballet Class

  1. “Balls of the feet”  This means that you need to keep the weight of your body on the front portion of your foot.  If you have to shift or move your hips in order to rise up on your foot you are not placed correctly and are “sitting in your heels”.  Weight placement is very important in ballet because it gives you the feeling of lightness and also helps you to move quickly and effortlessly.  If your weight is on your heels you will move more sluggishly.
  2. “Standing leg/Working leg”  You will probably hear this mostly during barre exercises.  Your standing leg is the leg you are standing on. 🙂 You may also hear the phrase “keep your weight over your standing leg”. Which is the same concept as “balls of the feet” but only on one foot.  Your working leg is the one out there working. But let’s be honest, sometimes your standing leg works harder than the working one. 🙂
  3. “Square off”  This can be referring to either your hips or your shoulders.  If you are standing in front of a wall, your shoulders/hips should be parallel to the wall.  This is common to hear in exercises when the leg is lifted.  You do not want either of your hips to move forward or backward, but to remain parallel to the wall in front of you.
  4. “Rotate”  Turnout. Turnout. Turnout.  Legs should always be rotated, or turned outward.  Your knees should be facing toward the sides of your body.
  5. “Double time”  If a teacher says double time they want you to complete the exercise faster.  Cut the amount of time it takes to do a step in half.  For example, if you do a step on every count of the music – 1, 2, 3, 4, you will then cut it in half to 1, &, 2, &.

So, there you have it.  Now go dance your heart out!

How Ballet Class Is Structured for Your Benefit

Have you ever had a teacher tell you that if you are more than 10 minutes late you can not participate in class?  I’m guessing that it is most likely that you have.  In my experience, this is a common rule for most dance classes and here is why.

A teacher structures and plans a ballet class very specifically in order to warm students up properly and to train and assist them in grasping a particular step or concept.  Believe it or not, each combination you do in class should be connected to each other in some way or another.  This means that the plies you do at the very beginning of class have a specific purpose and reason for the things you will be doing at the end of class.  For example, if your teacher is going to be focusing on pirouettes in the center, they may possibly incorporate barre exercises that help to strengthen the retire position.  Or maybe they focus on strength and balance or pushing off of the floor.  Everything has a connection, so it is crucial to be present for each part of class to really be engaged and make the most improvements.

It is especially important to not miss the beginning of class.  This is because all of classic barre work is designed to warm up the body properly.  It gets all of your joints and muscles moving the way they should in preparation for what will be taught  in the center.

How Ballet Class Is Structured

So how exactly should a ballet class be structured? A ballet class always begins with barre work.  These combinations will vary, but it will always be similar to this format and should alternate between slow and heavy combinations to quicker and lighter combinations.

Barre

  1. Plies
  2. Tendus
  3. Tendus with plie
  4. Degages
  5. Rond de jambe
  6. Frappe
  7. Fondu/Stretch
  8. Petits battements
  9. Adagio
  10. Grand battements

When I teach, barre work usually last for about 45 minutes in a 90 minute class.  Following barre work comes Center floor work.

Center

  1. Port de bras and transfer of weight movements (i.e. temps lie)
  2. Combinations including tendus, degages, fondus, adagio, pirouettes
  3. Grandes pirouettes or waltz across the floor

Center work usually lasts me around 20 minutes and then the remaining 20 minutes are used for jumping!  I feel that jumps often get overlooked as they are the last part of class and usually just get thrown together.  However, there are so many jumps in the ballet vocabulary, and there should be enough time dedicated to them that there is a chance to really master them.  Plus they are fun!
Allegro

  1. Petite allegro
  2. Medium allegro – slow heavy jumps (i.e. sissonnes)
  3. Grand allegro – Always my favorite part of class!

After grand allegro most teachers will do some sort of reverence exercise to cool down, and out of respect for the art form.  After class you should always thank your teacher and the pianist (if you are lucky to have one!).

So there is your ballet class!  Each combination is set to properly warm up each part of your body to prepare you to dance to your fullest potential.  🙂

Dancers – What is your favorite part of class?

Teachers – How do you structure your ballet class?

Ballet Basics: 4 Things to Have Ready Before Your First Ballet Class

If you are thinking about taking some ballet classes, but are lost trying to find everything you need for class, this will be a good starting place for you.  Here are my top four things to make sure your have ready for your first class.


1. Ballet shoes

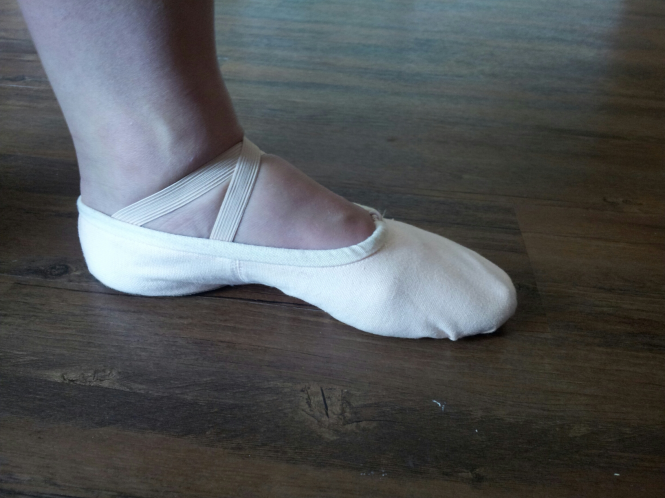
Ballet shoes come in either canvas or leather. I personally would recommend the canvas, mostly because ballet shoes end up stinking really bad and with the canvas shoes you can just throw them in the wash on a cold cycle (do not put them in the dryer, or they will shrink and no longer fit you!).  Ballet shoes also come with either a full sole or what we can a split sole.  Again I prefer the split sole mainly because it is easier to work through and shape the feet.  My favorite shoes are the Sansha canvas split soles.  Make sure you sew the elastics on before class and only wear your shoes on a dance floor. Wearing them around outside will put unnecessary wear and bring dirt into the studio that is not good for the dance floor.


2. Dancewear

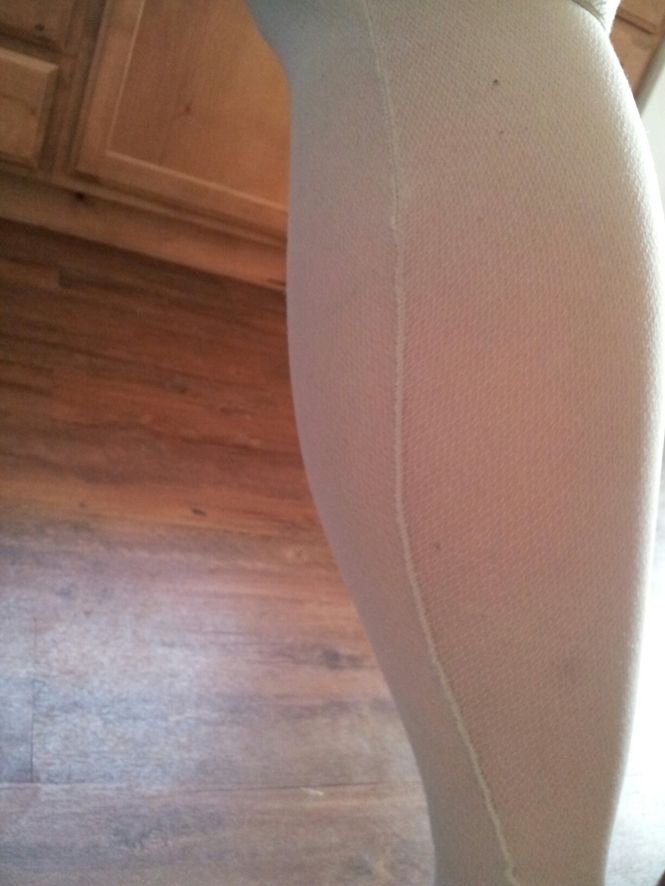
Most ballet classes want you to wear tights and a leotard. Check with the studio you are attending to see what their expectations are.  If you are attending an adult ballet class chances are that you can wear something like a tank top and yoga pants instead of tights and a leotard.  If you do need to wear tights however, you can go with the mesh seam tights or regular style tights.  My favorite kind of tights are the mesh ones that have seams down the back of the leg.

image

I like these because I feel that the seam down the back helps in being a visual aid for learning turnout. It can help both the teacher and the student see how they are working.  The regular tights are great as well.  They are a lot more comfortable if that is what you are after.

As for leotards, I would just start out with a basic black one.  Check to see if there are any specific requirements for your class.

An important thing to know about wearing your tights and leotard is that you should not wear underwear or a bra :).  I know it seems weird and/or gross but it is really distracting to teachers and other students when you can see lines from undergarments.  Most leotards have some built in lining and are tight enough to sufficiently hold you in place.  If you are really against the idea, or really need some extra support, just be sure your bra is not visible.


3. Water bottle

Not all studios have drinking fountains, and if you are working correctly, you will get thirsty!


4. Hair in bun

That’s right, hair in bun.  Don’t just pull your hair up in a pony tail.  If you want to learn how to dance like a ballerina you should look like one! Your hair should be secured tightly and no wispies flying out. You do not want your hair attacking you in the face while you are dancing. See how to do a ballet bun here.


Now you can grab your gym bag, and get to class!

How To Sew Elastics On Flat Ballet Shoes

Let’s talk today about sewing your ballet shoes.  It is really simple to do, and will not take up too much of your time.

I am going to assume that those who are reading this have absolutely no experience hand stitching anything.  However, if you already know how to sew things by hand, you have my permission to just skim through this quickly to get the main points.  Alright, let’s get started!

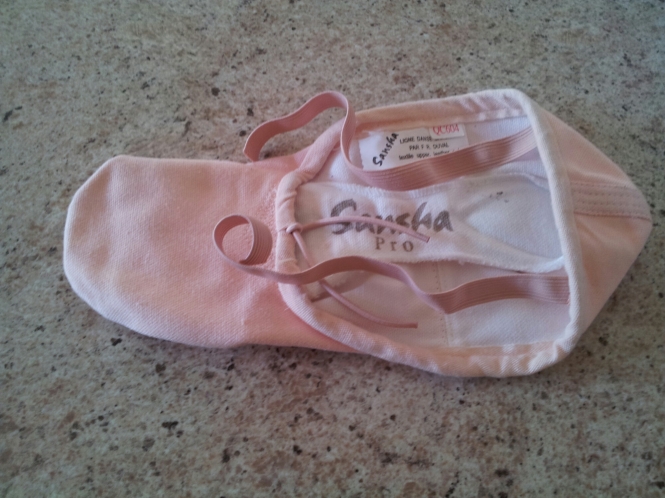
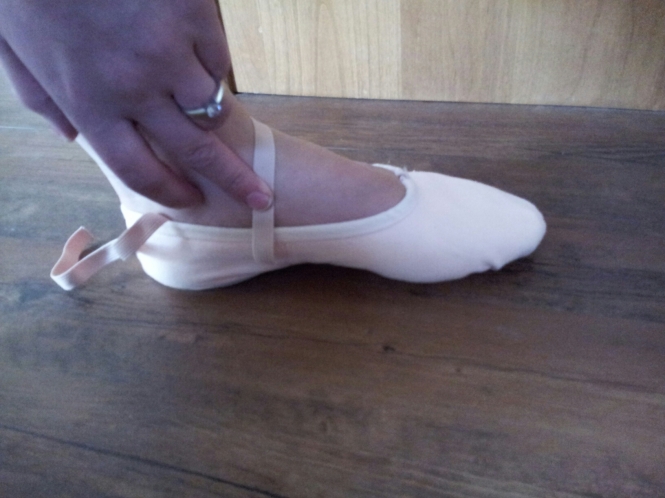
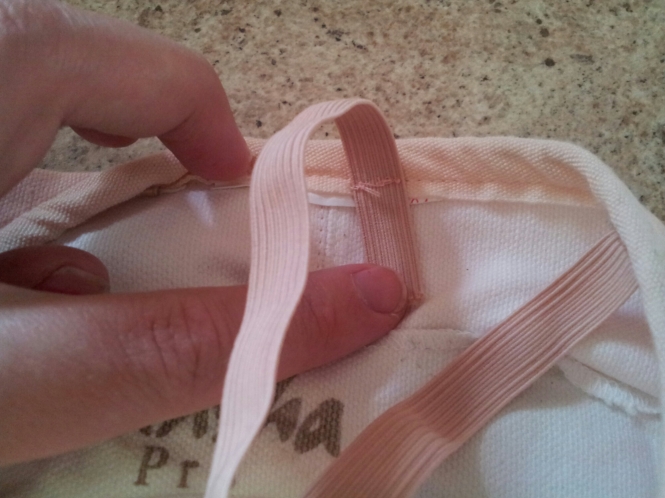
To begin, you start with a shoe. Some shoes will have just one elastic, in which you will just sew it so it sits straight across the ankle. Others, like mine below, will have two elastics, in which you will sew them in a criss cross pattern.
image

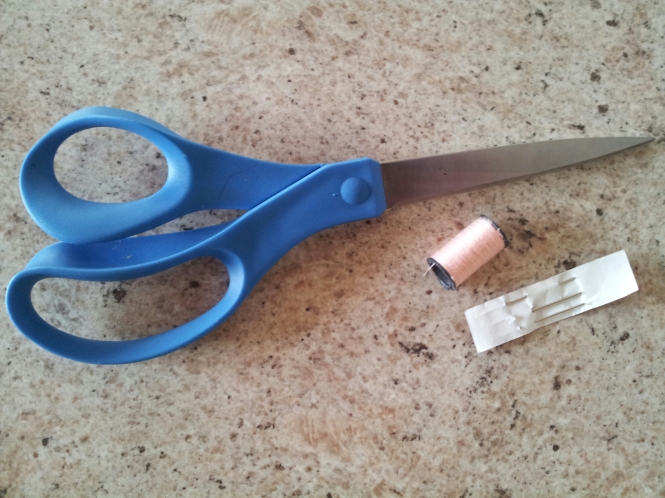
Next you grab some scissors, a sewing needle, and matching pink thread.
image

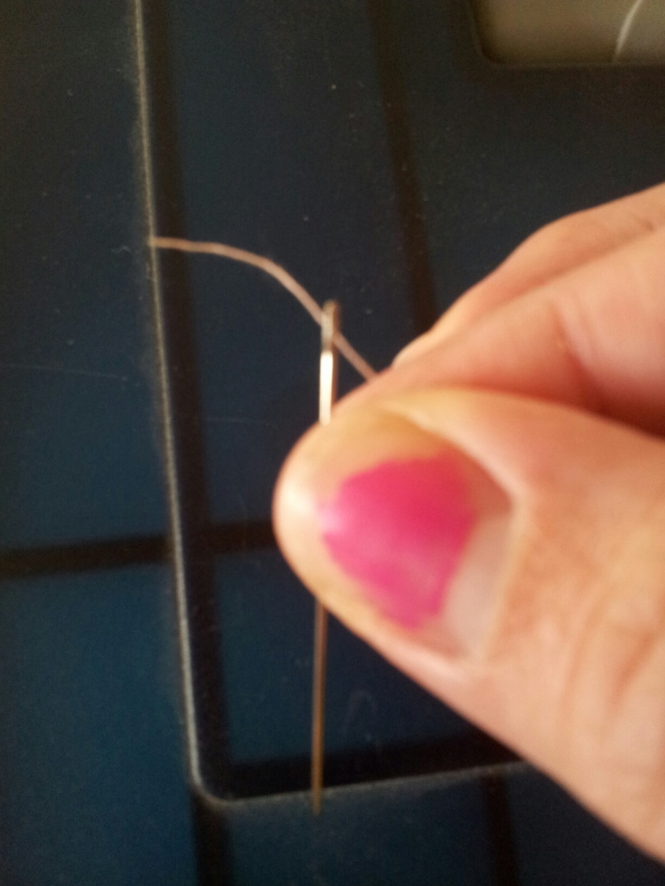
Take the thread and insert in through the hole at the top of the needle, like so. (my camera doesn’t do close ups very well and ignore my nails 🙂 )
image

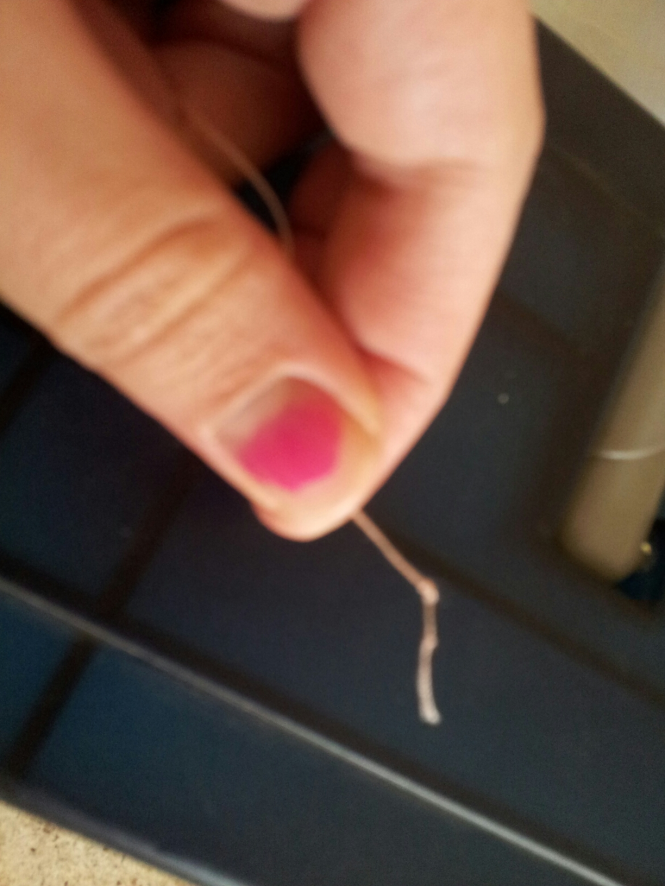
Pull the thread through until it is about 12 inches or so long. Now add another 12 inches to the other side of the needle, and cut the thread off the spool with your scissors. If you hold the needle in the middle there should be an equal amount of thread on each side. Take both ends of thread and tie them together in a knot. This will help to stop the thread from pulling through while stitching (I usually do a couple knots just to make it bigger).
image

Now set that aside, and try on your shoe. You are going to need to mark where you want the elastic to be. I usually put it right at the upper portion of the arch on my foot close to my heel. It will vary depending on your foot and the type of shoe you have, but it is usually right behind the side seam on my shoe.  A lot of people say to fold the heel of the shoe down to tell you where to put the elastic, but I have found that it really varies with each person.  So, try it on and make it look flattering on your foot.  Just don’t sew the elastic down by your toes, that is yucky :).  When in doubt, the closer to the heel the better.
image

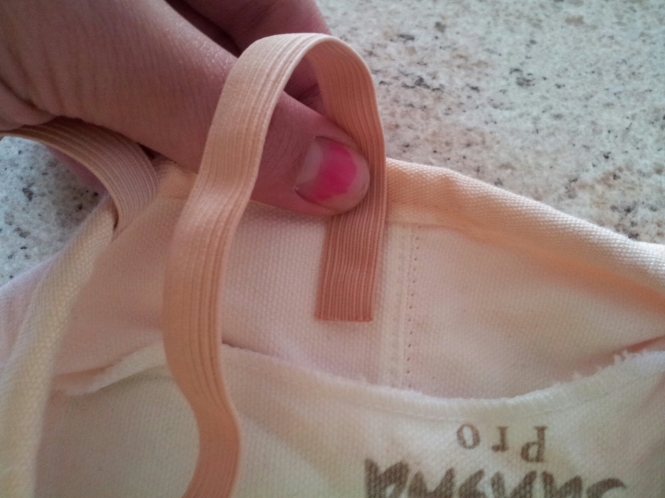
Take the shoe off and place the elastic where you marked on the inside of the shoe. Then slightly angle the elastic forward. This angle is not crucial, but it will help the elastic to lay better around your foot.
image

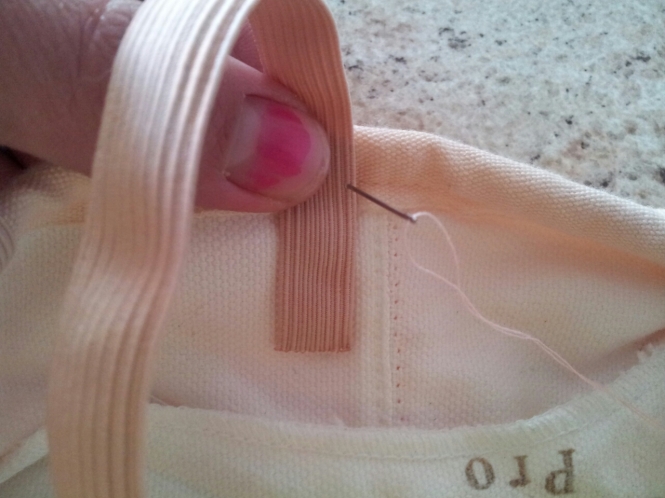
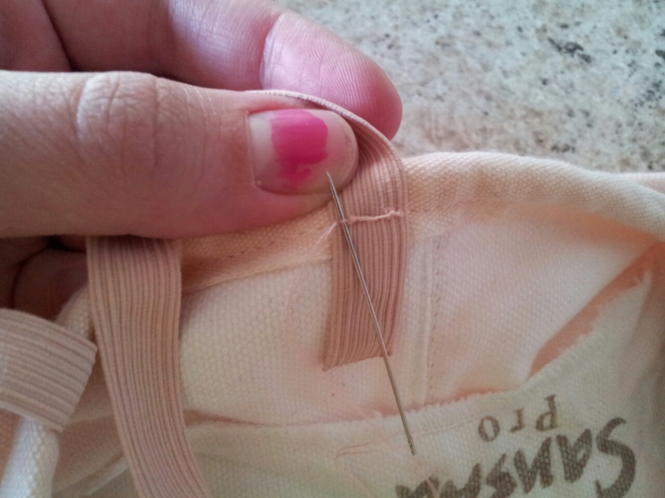
Next, take your needle and thread and poke it through on one side of the elastic as well as through the shoe. Try to poke it through the already existing seam from the shoe’s drawstring so your stitches won’t be as noticeable. Just make sure to not sew into the drawstring, or else it won’t work anymore. 🙂
image

Pull the the needle and thread all the way through until the knot keeps you from going any further. Then insert the needle again, this time from the outside of the shoe and slightly forward from where you were before (the size of an existing stitch on your shoe). Pull the needle and thread all the way through again. Now your needle should be on the inside of the shoe. Insert it again but this time go back to where you put your first hole. Pull it through. Now you are back on the outside. Insert needle again going slightly more forward than your last stitch. Pull through, back to the inside. Poke hole in to previous stitch.
image

Keep repeating this process until you have gone all the way across, like so.
image

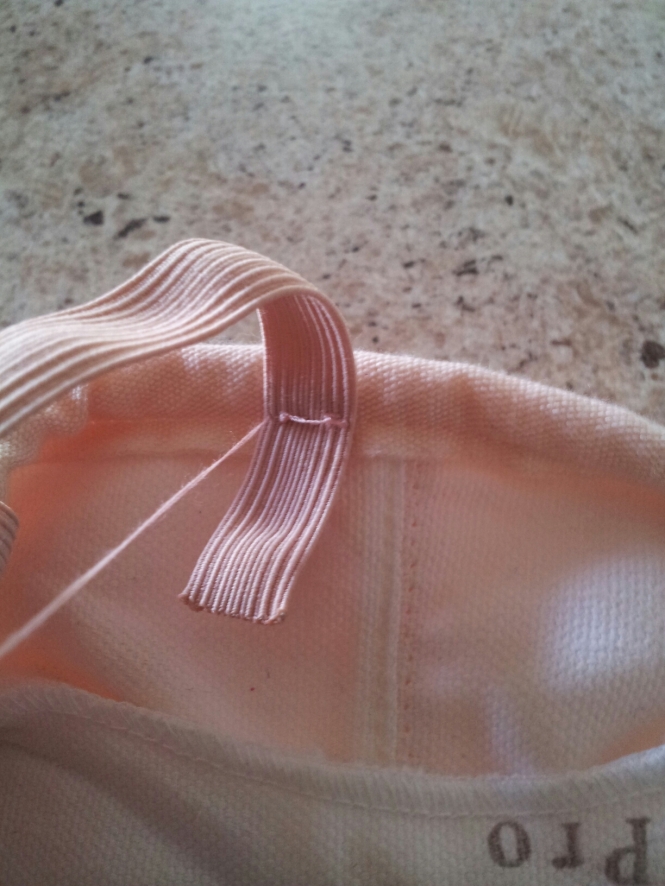
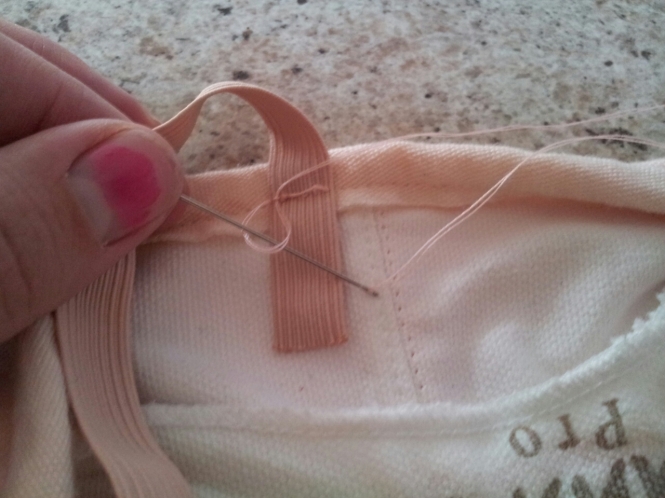
Now take your needle, and poke it underneath one of your stitches.
image

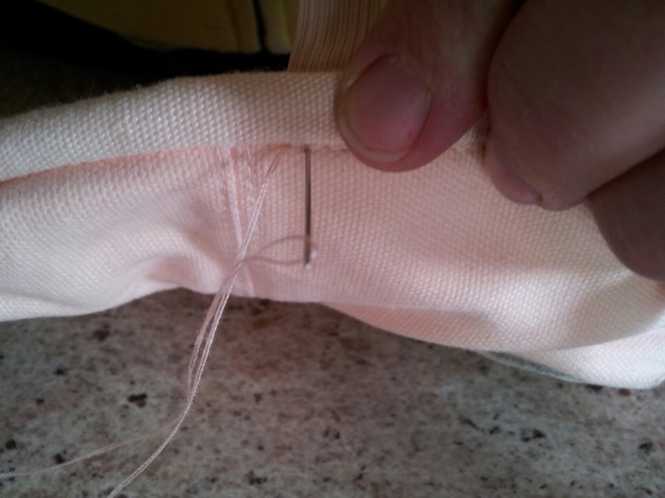
Pull the needle through almost the entire way, until there is a little loop. Insert your needle through the loop and pull it all the way to make a knot. Repeat once more for a stronger knot.
image

Take your scissors and cut the thread leaving just a small little tail. (notice how the elastic is angled here)
image

It you still have a lot of thread on your needle (which you should) you can just tie another knot and repeat the process on the other side of the shoe.
image

One other thing I need to mention here, is to make sure you tuck your drawstring into your shoe like in the above picture.  Do not tie it into a bow.  It is cute when the 5 year olds do it, but probably not so much with older folks. 🙂  If your drawstring is too long to tuck in, you can just tie it off in a knot and then cut off the excess string.  Tuck that baby in, and there you have it! A sewn ballet shoe.